Snapseed Editing with Snapseed QR Codes: Create & Apply Custom Preset
What Are Snapseed QR Codes in Snapseed Editing?
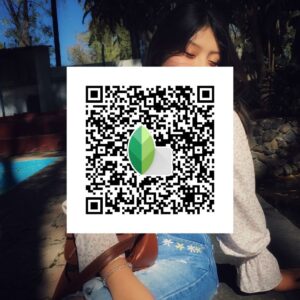
Snapseed QR Codes are a powerful feature in Snapseed editing that allows users to create and share custom presets using scannable codes. These QR codes store specific editing adjustments, making it easy for others to apply the same effects to their photos with just a scan. This feature promotes creativity and collaboration, enabling users to experiment with various editing styles effortlessly.
How to Create and Share Snapseed QR Codes?
Generating and sharing Snapseed QR Codes is a simple process:
- Edit Your Photo – Apply the desired filters, adjustments, and enhancements in Snapseed editing.
- Generate a QR Code – Tap the menu icon, select ‘QR Look,’ then choose ‘Create QR Look.’ This will create a unique QR code containing your edits.
- Share the Code – Save the QR code as an image or share it directly with others, allowing them to instantly apply your custom preset.
How to Apply a Snapseed QR Code to Your Photos?
Applying a preset from a Snapseed QR Code is quick and easy:
- Open the QR Code – Import the saved QR code image into Snapseed editing.
- Scan the Code – Tap the menu icon, select ‘QR Look,’ then choose ‘Scan QR Look.’ Snapseed will instantly apply the preset’s effects to your photo, replicating the original edits.
By leveraging Snapseed QR Codes, you can streamline your workflow, save time, and consistently achieve professional-quality edits in Snapseed editing.


Blurring Backgrounds in Snapseed
Importance of Background Blur
Blurring the background of a photo emphasizes the subject, creating a pleasing depth of field effect. This technique draws the viewer’s attention to the focal point, making it essential for portrait photography and artistic compositions.
Using the Lens Blur Tool
Snapseed offers the ‘Lens Blur’ tool to achieve background blur:
-
Access the Tool: Tap on ‘Tools’ > ‘Lens Blur.’
-
Adjust Focus Area: Position the focus circle over the subject. Pinch to resize and rotate the focus area as needed.
-
Customize Blur Strength: Swipe left or right to increase or decrease the blur intensity, tailoring the effect to your preference.
Enhancing Images with Selective Adjustments in Snapseed Editing
Introduction to Selective Adjustments in Snapseed Editing
The Selective tool in Snapseed editing is a powerful feature that allows users to make precise adjustments to specific areas of an image without altering the entire photo. Whether you want to correct exposure, enhance colors, or add depth, Snapseed editing provides full control over localized adjustments, making it an essential tool for photographers.
Adjusting Brightness, Contrast, and Saturation with Snapseed Editing
To utilize the Selective tool in Snapseed editing, follow these steps:
- Select the Tool – Tap on ‘Tools’ > ‘Selective.’
- Place a Control Point – Tap on the area you wish to adjust; a control point will appear.
- Adjust the Area of Influence – Pinch to expand or contract the selection area.
- Modify Parameters – Swipe up or down to choose between brightness, contrast, saturation, or structure. Then, swipe left or right to adjust the selected parameter.
Practical Applications of Selective Adjustments in Snapseed Editing
The Selective tool in Snapseed editing can be used in various ways to refine your photos:
- Correcting Exposure – Brighten underexposed areas without affecting well-lit sections.
- Enhancing Colors – Increase saturation in specific spots to make colors pop naturally.
- Adding Depth – Adjust contrast in targeted areas to create a more dynamic and visually appealing image.
By mastering Selective Adjustments in Snapseed editing, you can achieve a professional-level finish and bring out the best in every photo.
Healing Tool for Removing Unwanted Elements
Overview of the Healing Tool
The ‘Healing’ tool is designed to remove unwanted objects or blemishes from your photos seamlessly. It analyzes the surrounding pixels and blends the area to match the background, ensuring a natural look.
Step-by-Step Guide to Removing Blemishes and Objects
-
Access the Tool: Tap on ‘Tools’ > ‘Healing.’
-
Zoom In: Pinch to zoom into the area with the unwanted element for precise editing.
-
Apply the Tool: Gently tap or swipe over the object or blemish. Snapseed will replace it with surrounding pixels, effectively removing it from the image.
Best Practices for Seamless Edits
-
Work Incrementally: For larger objects, remove them in smaller sections to maintain consistency.
-
Pay Attention to Details: Ensure that patterns and textures align after healing to avoid noticeable edits.
-
Utilize Undo Function: If the result isn’t satisfactory, use the undo option and try again for a better outcome.
Conclusion
Snapseed offers a robust set of features that empower users to transform their photos directly from their mobile devices. By mastering tools like QR Codes, Lens Blur, Selective Adjustments, and the Healing tool, you can enhance your images with professional-quality edits. Embrace these functionalities to explore your creativity and elevate your mobile photography to new heights.
